-
يكشنبه, ۱۷ شهریور ۱۳۹۸، ۰۴:۴۷ ق.ظ
-
۱۲۶۶
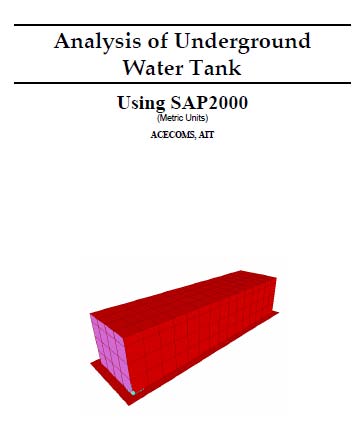
نام فایل: آنالیز مخازن آب بتنی مستطیلی مدفون با نرم افزار Sap2000
(Analysis of Underground Water Tank Using SAP2000)
پدیدآورنده: ACECOMS, AIT
سال انتشار: نامعلوم
حجم فایل: 3.6 مگابایت
لینک دانلود: ![]()
گام های لازم برای آنالیز مخازن بتنی مستطیلی و مدفون در خاک، به صورت مشروح در ادامه آورده شده است...
1 Analysis of Underground Water Tank Using SAP2000 (Metric Units)
2 Analysis of Underground Water Tank Using SAP2000 Table of Content Objective... 3 Problem... 3 Step by Step Start Model with Template Define Material Properties Define Shell Sections Modify Grid System Draw Top Slabs Draw Bottom Slabs Draw Wall Panels Define Load Cases Define and Assign Joint Pattern Assign Soil and Water Pressure on Wall Panels Assign Load on Top and Bottom Slabs Assign Spring Support Define Load Combinations Run Analysis View Analysis Results Analysis of Underground Water Tank 2/58
3 Objective To demonstrate and practice step-by-step on the modeling and static analysis of underground water tank Problem Carry out static analysis of underground water tank with the following details 3D View Plan View Analysis of Underground Water Tank 3/58
4 Section View 0.30 m 3.00 m 3.50 m 0.15 m Material Properties (Use Default Material) Compressive strength of concrete (f c ) = 281 kg/cm 2 Young Modulus of concrete (E c ) = 253,105 kg/cm 2 Unit Weight of Concrete = 2,403 kg/m 3 Unit Weight of Water = 1,000 kg/m 3 Unit Weight of Soil = 1,800 kg/m 3 Coefficient of Active Earth Pressure (Ka) = 0.6 (Assuming the back fill is cohesive) Modulus of Subgrade Reaction (K S ) Properties Direction Value (T/m 2 /m) Vertical (z) 1200 Horizontal (x and y) 500 Analysis of Underground Water Tank 4/58
5 Shell Section Properties Location Top Slabs Bottom Slabs Walls Section 15 cm 30 cm 25 cm Load Cases and Details Load Name Load Type Details DEAD Dead Load Self Weight: Calculate automatically using Self Weight Multiplier in SAP2000 LIVE Live Load 250 kg/m 2 on Top Slabs TANK1 TANK2 TANK3 SOIL Weight & Pressure of Fluid Weight & Pressure of Fluid Weight & Pressure of Fluid Weight & Pressure of Soil Weight and Pressure of Water on Walls and Bottom Slabs in Tank 1 Weight and Pressure of Water on Walls and Bottom Slabs in Tank 2 Weight and Pressure of Water on Walls and Bottom Slabs in Tank 3 Soil Pressure on All Side Walls and Cantilever Part of Base Slab (Not including any surcharge from service vehicles) UPLIFT Pressure of Water Uplift Pressure on Bottom Slabs (3.5 T/m 2 : Upward) Load Combinations (without Sanitary Durability Coefficient) Load Comb. No. Details 1 U = 1.4 DEAD WATER 2 U = 1.2 DEAD WATER LIVE +1.7 SOIL 3 U = 1.2 DEAD WATER LIVE +1.7 SOIL UPLIFT 4 U = 1.2 DEAD LIVE 5 U = 0.9 DEAD SOIL UPLIFT Sanitary Durability Coefficient (Modified ACI Capacity Factors for Water Retaining Structure) Reinforcement in Flexure Direct Tension/Hoop Reinforcement Excess Shear (for Stirrup) Compression + Flexure = 1.3 U = 1.6 U = 1.3 U = 1.0 U Analysis of Underground Water Tank 5/58
6 Step by Step 1. Start Model with Template Step 1-1: Select Working Unit and Start New Model with Template Start up screen of SAP2000, select working unit to be ton-m at drop-down menu on the bottom-right of screen and click on to start new model with template Step 1-2: Select Template Select Grid Only by clicking on it Analysis of Underground Water Tank 6/58
7 Step 1-3: Specify Grid System Specify grid system as shown in above figure and click OK. Analysis of Underground Water Tank 7/58
8 2. Define Material Properties Step 2-1: Change Working Unit Change working unit to kg-cm Step 2-2: Modify Material Properties Go to Define >> Materials..., and select CONC, click on Modify/ Show Material... Analysis of Underground Water Tank 8/58
9 Step 2-3: Accept the Default Values Click OK to accept the default values. Next, also click OK in the preceding window (Define Materials). Analysis of Underground Water Tank 9/58
10 3. Define Shell Sections Three shell sections (thick. = 15, 25 and 30 cm) are required in this model. Step 3-1: Add New Shell Section Go to Define >> Area Section, select Shell from drop-down menu and click on Add New Section. Step 3-2: Specify Shell Section Properties Specify shell section properties as shown below for shell section thickness = 15 cm. Afterwards, click OK. Analysis of Underground Water Tank 10/58
11 Step 3-3: Add 2 New Shell Sections Repeat Step 3-1 and 3-2 to add two more shell sections with thicknesses of 25 and 30 cm, respectively. Next, click OK. Analysis of Underground Water Tank 11/58
12 4. Modify Grid System Step 4-1: Modify Grid System Select working unit to be Ton, m, C, go to Define >> Coordinate System/Grid and click on Modify/Show System... Analysis of Underground Water Tank 12/58
13 Step 4-2: Modify Grid System Modify grid system as shown below. Click OK button. Next, also click OK in the preceding window (Coordinate/ Grid Systems). Analysis of Underground Water Tank 13/58
14 5. Draw Top Slabs Step 5-1: Change Plan View to Top Slab Level Select left window, click on Set XY View button to change view to plan view and and click on or to move to move plan level to Z = 3.5 m. Plan elevation (X-Y Plane) is displayed at top-left of window. Step 5-2: Fill Object to Show Shell Element Go to View >> Set Display Options, select Fill Object and Apply to All Windows. Next, click OK. Analysis of Underground Water Tank 14/58
15 Step 5-3: Draw Roof Slab Click on Quick Draw Area Element button, select TH15CM and click on roof slab panel area as shown in figure below one by one. Step 5-4: Divide Roof Slab Click on Areas... Set Select Mode button, select all roof slab panels, go to Edit >> Divide Analysis of Underground Water Tank 15/58
16 Step 5-5: Specify Slab Meshing Size Specify parameters as shown below. Then, click OK. Analysis of Underground Water Tank 16/58
17 6. Draw Bottom Slabs Step 6-1: Move Plan View to Bottom Level Click on twice to move plan view to the level Z = Step 6-2: Draw Bottom Slabs Click on Draw Rectangular Area Element button, select TH30CM and click on two nodes at the corners of bottom slab as shown below. Analysis of Underground Water Tank 17/58
18 Step 6-3: Mesh Bottom Slabs Select bottom slabs as shown in figure below and go to Edit >> Divide Areas... Specify parameters as shown below. Then, click OK. Analysis of Underground Water Tank 18/58
19 Step 6-4: Mesh Bottom Slabs Select bottom slabs as shown below and go to Edit >> Divide Areas... Specify parameters as shown below. Then, click OK. Analysis of Underground Water Tank 19/58
20 Step 6-5: Mesh Bottom Slabs Again, select bottom slabs as shown below and go to Edit >> Divide Areas... Specify parameters as shown below. Then, click OK. Analysis of Underground Water Tank 20/58
21 Step 6-6: Mesh Bottom Slabs Once again, select bottom slabs as shown below and go to Edit >> Divide Areas... Specify parameters as shown below. Then, click OK. Analysis of Underground Water Tank 21/58
22 7. Draw Wall Panels Step 7-1: Change View to Elevation View to XZ Plane Select left window, click on Set XZ View button to change view and click on or to move elevation view to Y = 0 m. Step 7-2: Draw Wall Panels Click on Quick Draw Area Element button, select TH25CM and draw area to cover wall panel area as shown in figure below. Analysis of Underground Water Tank 22/58
23 Step 7-3: Mesh Wall Panels Click on, select the top part of the wall panel as shown in figure below and go to Edit >> Divide Areas... Specify parameters as shown below. Then, click OK. Analysis of Underground Water Tank 23/58
24 Step 7-4: Mesh Wall Panels Select bottom wall panels as shown in above figure and go to Edit >> Mesh Area. Specify parameters as shown below. Then, click OK. Analysis of Underground Water Tank 24/58
25 Step 7-5: Copy Wall Panels Select all wall panels, go to Edit >> Replicate by drawing rectangular selection to cover all wall panels. Specify parameters as shown below. Then, click OK. Analysis of Underground Water Tank 25/58
26 Step 7-6: Change View to Elevation View to YZ Plane Select left window, click on Set YZ View button to change view and click on or to move elevation view to X = 0 m. Step 7-7: Draw Wall Panels Click on Quick Draw Area Element button, select TH25CM and draw rectangular to cover wall areas as shown in above figure. Analysis of Underground Water Tank 26/58
27 Step 7-8: Mesh Wall Panels Click on Set Select Mode button, select top wall panels as shown in figure below and go to Edit >> Divide Areas... Specify parameters as shown below. Then, click OK. Analysis of Underground Water Tank 27/58
28 Step 7-9: Mesh Wall Panels Select bottom wall panels as shown in figure below and go to Edit >> Divide Areas... Specify parameters as shown below. Then, click OK. Analysis of Underground Water Tank 28/58
29 Step 7-10: Copy Wall Panels Select all wall panels and go to Edit >> Replicate Specify parameters as shown below. Then, click OK. Analysis of Underground Water Tank 29/58
30 8. Define Load Cases Water load in each tank will be assigned with difference load cases (TANK1, TANK2 and TANK3) for all possible loading condition. Step 8-1: Add Load Case Go to Define >> Load Cases. Then, specify load case name in text box Load Case and then click on Add New Load for each and every load case as shown in figure below Analysis of Underground Water Tank 30/58
31 9. Define and Assign Joint Pattern A joint pattern is simply a set of scalar values defined at the joints for assigning more complex distributions of temperature and pressure over the structure. Joint patterns by themselves create no loads on the structure. There are two types of joint pattern as described below. a. X Y, Z Multiplier Method. Type values in the Constant A, B, C and D edit boxes. The pattern value at each selected joint is calculated as Ax+By+Cz+D, where x, y and z are the joint coordinates of the selected joint in the current coordinate system. The units of constants A, B, and C are 1/Length and constant D is unitless. The calculated pattern value is also unitless. As an example of this assignment method, the following input defines the joint pattern values used to apply a varying soil pressure load on a wall. Analysis of Underground Water Tank 31/58
32 b. Z Coordinate at Zero Pressure and Weight Per Unit Volume Method. Type Z Coordinate and weight per unit volume (Wt per unit Vol) values in the edit boxes and select a Restriction from the drop down list, then click the Add button. If needed, check the Added Uniform Value per Unit Area check box to specify an added uniform value per unit area. The specified Z coordinate is assumed to be in the current coordinate system. The pattern value at each selected joint is calculated as: Zcoord = specified Z coordinate z = Z coordinate of the selected joint in the current coordinate system w = specified weight per unit volume A = specified added value per unit area All appropriate unit conversion factors are used when calculating the pattern value; however, after the pattern value has been obtained, it is thereafter assumed to be unitless. Note that positive and negative value restrictions can be specified individually for each set of Z coordinates and weight per unit volume in the summation as well as for the final calculated pattern value. As an example of this assignment method, the following input defines the joint pattern values used to apply a varying soil pressure load on a wall. Analysis of Underground Water Tank 32/58
33 Step 9-1: Add New Pattern Go to Define >> Joint Patterns, enter pattern name and click on Add New Pattern Name to add 2 new joint patterns ( SOIL and WATER ) Step 9-2: Select Only Wall Panels Activate 3D View Window by clicking on it, go to Select >> Select >> Area Section and select TH25CM from the list to select only wall panels. Go to View >> Selection Only to view only selected element (wall panels) Analysis of Underground Water Tank 33/58
34 Step 9-3: View and Select Only Wall Panels After viewing the selected elements only (wall panels), select all elements in 3D view. Step 9-4: Assign Joint Pattern ( SOIL ) Go to Assign >> Joint Patterns and specify parameters as shown in figure below. Afterwards, click OK. Analysis of Underground Water Tank 34/58
35 Step 9-5: Set View Limit Go to View >> Set Limit and enter Set Z Axis Limits as shown in figure below. Afterwards, click OK. Step 9-6: Select Wall Panels Select all shell elements in 3D view. Analysis of Underground Water Tank 35/58
36 Step 9-7: Assign Joint Pattern ( SOIL ) Go to Assign >> Joint Patterns and specify parameters as shown in figure below. Step 9-8: Clear Z Axis View Limit and Show All Elements Specify parameters as shown in figure below and go to View >> Show All. Analysis of Underground Water Tank 36/58
37 10. Assign Soil and Water Pressure on Wall Panels Pressure loads are assigned as triangular load using joint pattern. The direction of pressure depends on side of shell element (Positive pressures are directed toward the interior of the element.). In SAP2000, 2 sides of shell element (top and bottom) are represented as face 5 and face 6. Face 5 of shell element is the positive side of local axis 3, shown in blue color arrow. Local axes 1, 2, and 3 are marked with red, white and blue. Water pressures are assigned in the load cases separately for each tank (TANK1, TANK2 and TANK3). Note: To view local axis of shell element: Go to View >> Set Display Options and or click on Set Display Options button and select Local Axes in Areas To set color for face of shell element (Area): Go to Options >> Color >> Display Analysis of Underground Water Tank 37/58
38 Step 10-1: Change to in X-Z Plane at Y = 0.00 Select left window, click on Set XZ View button and move elevation view to Y = 0 by clicking or. The location of this elevation is displayed in blue outline in 3D view (right window). Step 10-2: Assign Water Pressure Load to Tank 1 Wall in XZ Plan at Y = 4.00 Select wall panels in tank 1, go to Assign >> Area Load >> Surface Pressure (All) and specify pressure parameters as shown in figure below. Analysis of Underground Water Tank 38/58
39 Step 10-3: Assign Water Pressure Load to Tank 2 Wall in XZ Plan at Y = 4.00 Select wall panels in tank 2, go to Assign >> Area Load >> Surface Pressure (All) and specify pressure parameters as shown in figure below. Step 10-4: Assign Water Pressure Load to Tank 3 Wall in XZ Plan at Y = 4.00 Select wall panels in tank 3, go to Assign >> Area Load >> Surface Pressure (All) and specify pressure parameters as shown in figure below. Analysis of Underground Water Tank 39/58
40 Step 10-5: Assign Soil Pressure to All Tank Wall in XZ Plan at Y = 4.00 Soil pressure will be assigned to opposite face of water pressure (face 5). Select wall panels in all tanks, go to Assign >> Area Load >> Surface Pressure (All), select Add to Existing Loads options and specify pressure parameters as shown in figure below (Multiplier = Ka x unit weight of soil = 0.6 x 1.8 = 1.08). Note: For more details on coefficient of active lateral earth pressure (K a ), please refer the standard book on geotechnical engineering (for example: page 478 of Foundation Analysis and Design by Joseph E. Bowles) Analysis of Underground Water Tank 40/58
41 Step 10-6: Change View to XZ Plan to Y = 4.00 Move elevation view to Y = 4.00 by clicking or. In this elevation view, face 5 of wall panels faces outside of water tank then water pressure load will be assigned at face 6 (water tank) and soil pressure will be assigned at face 5 (outside tank) by using same parameters as assigned at elevation Y = Step 10-7: Assign Water Pressure Load to Tank 1 Wall in XZ Plan at Y = 0.00 Select wall panels in tank 1, go to Assign >> Area Load >> Surface Pressure (All) and specify pressure parameters as shown in figure below. Analysis of Underground Water Tank 41/58
42 Step 10-8: Assign Water Pressure Load to Tank 2 Wall in XZ Plan at Y = 0.00 Select wall panels in tank 2, go to Assign >> Area Load >> Surface Pressure (All) and specify pressure parameters as shown in figure below. Step 10-9: Assign Water Pressure Load to Tank 3 Wall in XZ Plan at Y = 0.00 Select wall panels in tank 3, go to Assign >> Area Load >> Surface Pressure (All) and specify pressure parameters as shown in figure below. Analysis of Underground Water Tank 42/58
43 Step 10-10: Assign Soil Pressure to All Tank Wall in XZ Plan at Y = 0.00 Soil pressure will be assigned to opposite face of water pressure (face 5). Select wall panels in all tanks, go to Assign >> Area Load >> Surface Pressure (All), select Add to Existing Loads options and specify pressure parameters as shown in figure below (Multiplier = Ka x unit weight of soil = 0.6 x 1.8 = 1.08). Step 10-11: Change to in YZ Plan at X = 0 Select left window, click on and move elevation view to X= 0 by clicking or. In this elevation view, shows face 5 of wall panels is inside tank then water pressure will be assigned in face 5 and soil pressure will be assigned in face 6. Analysis of Underground Water Tank 43/58
44 Step 10-12: Assign Water and Soil Pressure to Tank 1 Wall in XZ Plan at X = 0 Select wall panels in tank 1, go to Assign >> Area Load >> Surface Pressure (All) and specify pressure parameters as shown in figure below to assign pressure load one by one. Step 10-13: Assign Water Pressure for Tank 1 and 2 in XZ Plan at X = 5 Click on to move elevation view, select all wall panels, go to Assign >> Area Load >> Surface Pressure (All) and specify pressure parameters as shown in figure below to assign pressure load one by one. Analysis of Underground Water Tank 44/58
45 Step 10-14: Assign Water Pressure for Tank 2 and 3 in XZ Plan at X = 10 Click on to move elevation view, select all wall panels, go to Assign >> Area Load >> Surface Pressure (All) and specify pressure parameters as shown in figure below to assign pressure load one by one. Step 10-15: Assign Water and Soil Pressure to Tank 3 Wall in XZ Plan at X = 15 Click on to move elevation view, select all wall panels, go to Assign >> Area Load >> Surface Pressure (All) and specify pressure parameters as shown in figure below to assign pressure load one by one. Analysis of Underground Water Tank 45/58
46 11. Assign Load on Top and Bottom Slabs Step 11-1: Assign Live Load on Top Slabs (Z = 3.5) Change view to XY plan at Z = 3.5 by clicking on Set XY View button and move plan level to Z = 3.50 by clicking on. Select all slab panels, go to Assign >> Area Loads >> Uniform (Shell) and specify parameters as shown in figure below. Step 11-2: Assign Water Pressure in Bottom Slabs at Tank 1 (Z = 0.0) Click on to Z = 0, Select bottom slabs of tank 1, go to Assign >> Area Loads >> Uniform (Shell) and specify parameters as shown in figure below. Note: To do slab selection easier, deactivate snap option by deselect Intersections button Points and Grid Analysis of Underground Water Tank 46/58
47 Step 11-3: Assign Water Pressure in Bottom Slabs at Tank 2 (Z = 0.0) Select bottom slabs of tank 2, go to Assign >> Area Loads >> Assign >> Area Loads >> Uniform (Shell) and specify parameters as shown in figure below. Step 11-4: Assign Water Pressure in Bottom Slabs at Tank 3 (Z = 0.0) Select bottom slabs of tank 3, go to Assign >> Area Loads >> Uniform (Shell) and specify parameters as shown in figure below. Analysis of Underground Water Tank 47/58
48 Step 11-5: Assign Soil Pressure on Cantilever Slabs (Z = 0.0) Select cantilever slabs, go to Assign >> Area Loads >> Uniform (Shell) and specify parameters as shown in figure below. Note: Soil Pressure = ( / /2) x 1.8 = ton/m 2 Step 11-6: Assign Uplift Pressure in Bottom Slabs (Z = 0.0) Select all slabs, go to Assign >> Area Loads >> Uniform and specify parameters as shown in above figure. Negative value is assigned for Gravity direction. Note: Soil Pressure = / /2 = ton/m 2 Analysis of Underground Water Tank 48/58
49 12. Assign Spring Support Vertical Spring (Z Direction) Vertical spring support can be calculated from length and cross section of pile as shown in following details. Area (A) = 455 cm 2 Length (L) = 20 m Modulus of Concrete (E c ) = 253,150 kg/cm 2 K (Vertical) = 2 x E x A / L = 2 x 253,150 x 455 / 2000 = 115,183 kg/cm Horizontal Spring (X and Y Direction) Horizontal spring support will be assigned as line spring using dummy frame element (30 x 30 cm) and can be calculated from contact area between soil and foundation as shown in following detail Foundation Depth (D) = 0.30 m Modulus of Subgrade Reaction (K S ) = 500 T/m 2 /m K (Horizontal) = D x K S = 500 x 0.3 = 150 T/m/m Note: 1. The soil restraints on side walls have not been included. If the lateral soil restraint and water pressure are applied together the moment on the side walls will be less than when tank has water without back fill. 2. For more details on modulus of subgrade reaction (K s ), please refer the standard book on geotechnical engineering (for example: page 405 of Foundation Analysis and Design by Joseph E. Bowles) Step 12-1: Select Nodes at Pile Location to Assign Vertical Springs Select working unit = kg, cm, activate snap option by clicking on Points and Grid Intersections button and select support nodes by clicking on nodes at pile location as shown in above figure. Analysis of Underground Water Tank 49/58
50 Step 12-2: Assign Vertical Springs Go to Assign >> Joint >> Springs and specify parameters as shown in above figure. Step 12-3: Add DUMMY Frame Section Go to Define >> Frame Sections..., select Add Rectangular from second dropdown menu. Click Add New Property... and specify parameters as shown in figure below. Note: The beam does not exist in the tank in reality. The beam is defined only for the propose of applying lateral soil restraints. The dimensions of this beam are assumed based on the thickness of the base slab (30 cm). Analysis of Underground Water Tank 50/58
51 Step 12-4: Draw DUMMY Frame Section Click on Draw Frame/Cable Element button, select DUMMY and draw frame section as shown in figure below. Step 12-5: Assign Horizontal Springs Change working unit to Ton, m, click on Set Select Mode button, select DUMMY frames as shown in above figure, go to Assign >> Frame/Cable/Tendon >> Line Springs and specify parameter as shown in figure below. Analysis of Underground Water Tank 51/58
52 Step 12-6: Apply Automatic Frame Mesh to DUMMY Frames Select all DUMMY frames by clicking on Get Previous Selection button, go to Assign >> Frame/Cable/Tendon >> Automatic Frame Mesh and specify parameters as shown in figure below. 13. Define Load Combinations Envelop option is used in load combination ( WATER ) to find maximum and minimum results among of all possible full or empty water in each tank. Load combination details (without sanitary durability coefficient) are summarized in following table. Load Combination Name Combination Type Combination Details TANK120 Linear Add TANK1 + TANK2 TANK023 Linear Add TANK2 + TANK3 TANK103 Linear Add TANK1 + TANK3 TANK123 Linear Add TANK1 + TANK2 + TANK3 WATER Envelope TANK1, TANK2, TANK3, TANK120, TANK023, TANK103, TANK123 DESIGN1 Linear Add 1.4 DEAD WATER DESIGN2 Linear Add 1.2 DEAD WATER LIVE +1.7 SOIL DESIGN3 Linear Add 1.2 DEAD WATER LIVE +1.7 SOIL UPLIFT DESIGN4 Linear Add 1.2 DEAD LIVE DESIGN5 Linear Add 0.9 DEAD SOIL UPLIFT Analysis of Underground Water Tank 52/58
53 Step 13-1: Add New Load Combination Go to Define >> Combinations and click on Add New Combo Step 13-2: Define Load Combination Specify Name, select Combination Type, enter load and scale factor and click on Add to define load combination as shown in abovementioned table. Repeat this step to enter load combination as shown in table from previous page. Analysis of Underground Water Tank 53/58
54 14. Run Analysis Step 14-1: Start Analysis Go to Analyze > Run Analysis or click on Run Analysis button and click on Run Now button to start analysis and wait until analysis process complete. Step 14-2: Complete Analysis Wait until analysis status window display ANALYSIS COMPLETE. Analysis of Underground Water Tank 54/58
55 15. View Analysis Results Forces and stresses in shell element for slabs, walls and footing can be displayed in color contour. To use these results for design, sanitary durability coefficients need to be applied as following details. Reinforcement in Flexure Direct Tension/Hoop Reinforcement Excess Shear (for Stirrup) Compression + Flexure **U = Load Combination = 1.3 U = 1.6 U = 1.3 U = 1.0 U The direction and sign convention of forces/ stresses in shell element are described in SAP2000 Analysis Reference Manual page 131 to page 151 that is available in PDF format (file name SapRefer.pdf ) located at the Manual subfolder in folder that SAP2000 has been installed in your computer. Analysis of Underground Water Tank 55/58
56 How to Compute Reinforcement from Finite Element Output The direction of reinforcement for M11 and M 22 are as shown in left figure, Step 15-1: Select Shell Analysis Results to View in Graphic Go to Display >> Forces/Stresses >> Shells and select desired result parameters Analysis of Underground Water Tank 56/58
57 Step 15-2: View Shell Analysis Results in Contour Forces/Stresses in shell elements are displayed in contour color. Color tab at the bottom of screen indicates the value range of the results. Step 15-3: Select Shell Analysis Results to View in Tabular Form Forces/Stresses in shell elements are displayed in tabular form. Go to Display >> Show Table. Select Area Output, click on Select Analysis Cases to select desired load cases and combinations Analysis of Underground Water Tank 57/58
58 Step 15-4: View Shell Analysis Results to View in Tabular Form Shell analysis results are displayed in tabular form as shown in figure below. Analysis of Underground Water Tank 58/58